
Time to capture some memorable images of your Summer Carnival fun at night….. — The warm night air, the excitement of your local spring/ summer carnivals, fun times – rides, lights and “carnival food”!

# 1: Shoot RAW – High Quality Images give you flexibility in the Editing Process
- The color, movement, lights – all make for a wide dynamic range. You want to capture this yumminess to capture the spirit of the Carnival. RAW images will retain the most ‘information’. Allowing you to capture the full dynamic range of the scene.
- RAW allows for more creative latitude in Post Processing: On things like Color Temp/White Balance, Exposure adjustments
# 2: Use a sturdy tripod.
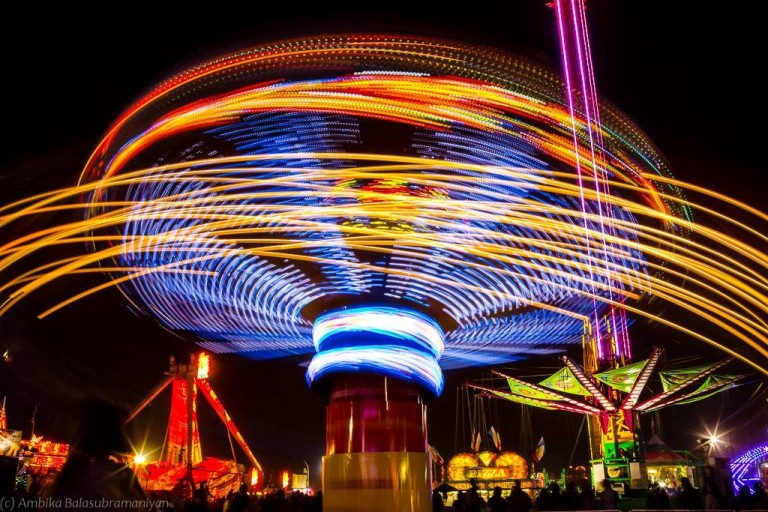
- Low light/ Night Photography: Low light, long exposures yield interest in your carnival images – especially when there is movement!
- When you’re shooting on a tripod don’t use image stabilization. Remember to turn it off. Using image stabilization when you are on a tripod will it will reduce image sharpness rather than increase sharpness.
- Note: Not all of your low light work needs a tripod (a tripod will typically yield better results). Learn and remember to use the ISO settings. Current digital cameras offer exceptional high ISO performance that open up a whole new range of opportunities for low light work as well as shortening exposure times.
#3: Remember to walk around to Scout your Photo opportunities and plan your time at the carnival
- A quick stroll around the area when you arrive will allow you to scope out the scene and identify interesting rides, stalls and photographic compositions. This pre-planning will help you when the skies darken, lights come-on & the crowds thicken. It will also allow you to make the best use of your twilight hour.
- Being a bit early will also typically mean less crowded rides so you can get close to the barriers and get different compositions.
#4: Arrive early twilight and stay after dark!
- The golden hour for carnivals is different – you have a wonderful 45 min window after sunset (loss of direct light) & before darkness creeps in .Shooting during this time will bring out all the colors in the carnival lights & environmental details against a deep blue sky. Twilight & blue hour offer some interesting possibilities: Twinkling lights on the rides, the vivid paint work on the ride structures, beautiful sunset sky colors, and lower dynamic range across the image; all making for a more interesting image.
- As it turns dark, watch for contrast in images and pay attention to shadow detail. Watch your histograms & if you have a ND filter – you can use it to cut back on some of the ambient brightness.
#5: Lens Choices: Go Fast & Go Long, Go Wide
- Make sure you bring along a good mix of lenses- there is so much variety at a carnival! Wide lens used appropriately can add drama to your images. Long lens are great for candid people images and for isolating the rides.
- You can use your lens hood to minimize flares from unwanted sources for low light work that may have light sources as part of composition. A carnival has many flood lights that can cause lens flare. Watch for it!

#6: Master the use of Manual Mode:
- For nighttime exposures & special effects you should have good command of Manual mode. It will allow you to have more creative control. Carnivals are surprisingly bright – you will generally get better results when you are able to photograph in Manual mode with greater control over exposure /shutter speed combinations.
- Auto White Balance set to Tungsten will neutralize some the “red-orange” glow.
#7: Experiment! Experiment! Experiment!
- Start with about 200 ISO setting & about 2-3 sec exposure for a start and then adjust from there. Feel free to be creative and play around with settings till you get the feel you are hoping to get in your images. Different rides will end up at a different setting depending on the lighting levels & speed of the ride.
- Check you histograms — this is the best way to tell if you have a workable image. You can work through your exposure settings to get the image you want by using your histograms as a guide. When you are photographing rides with longer exposures – watch for the blowout in highlights.
- Take test shots – check focus/sharpness, composition, blur effects – each ride will have a different exposure duration to get the most pleasing light effects. Also check out the different White Balance settings for different moods.

#8: Remember to have fun!
- After all you are at the carnival….remember to have fun and enjoy your time there! Try a ride (you will get a different perspective!), play a game – take a quick time travel to your youth!

